
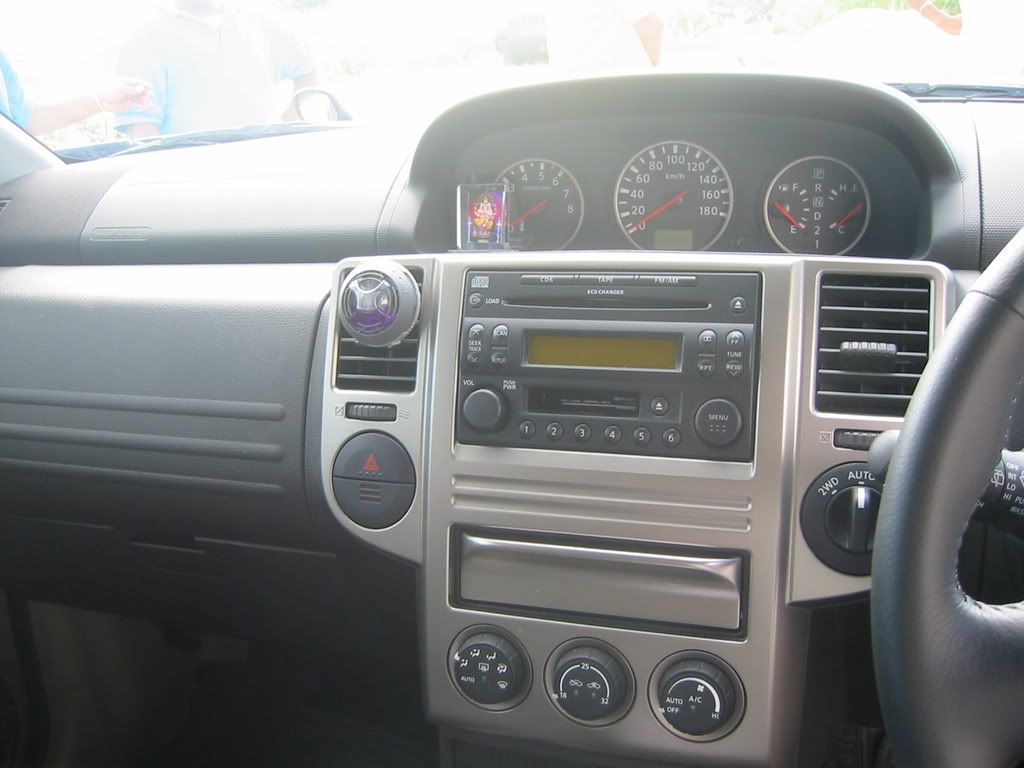
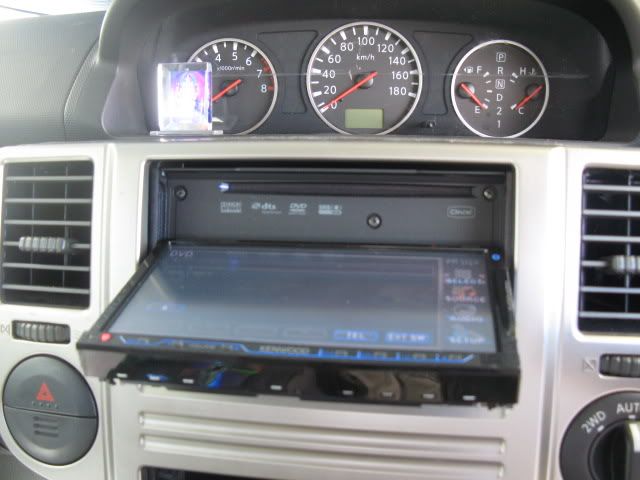
Ok guys - I read a few thread where a couple of guys were talking about expanding their Xtrail audio..... I do not know if the stock head units (HU) differ with various Xtrail models.....but my original HU looks like this:
![Image]()
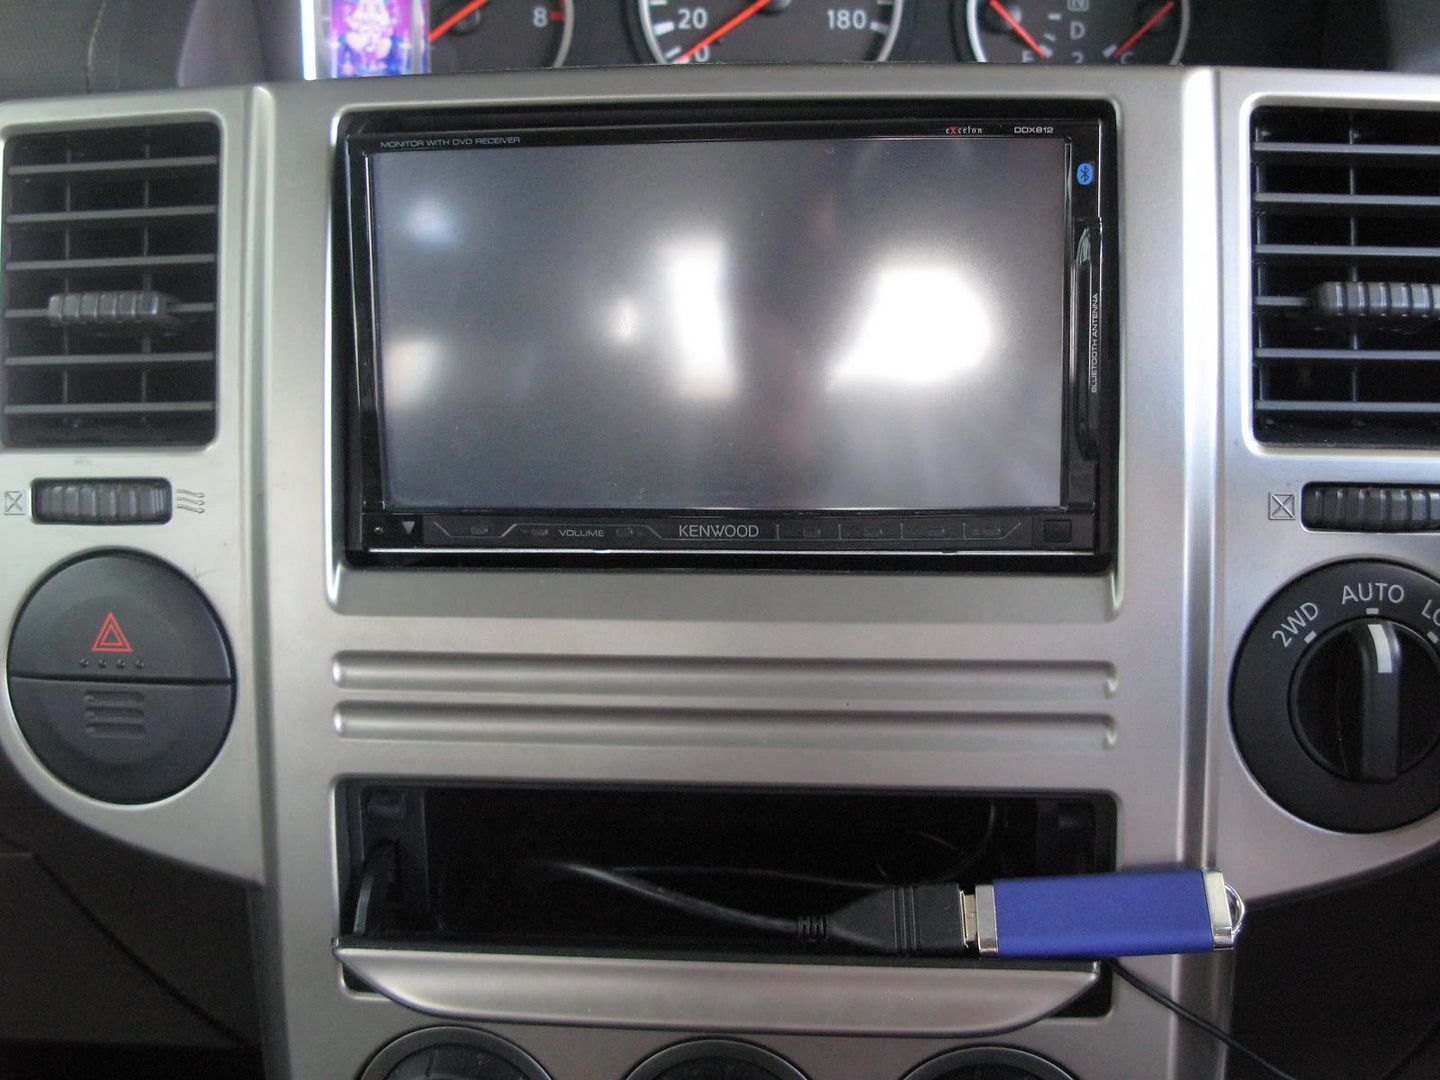
I replaced mine with a Kenwood double din HU (DDX 812). Cost me US$ 713 at Onlinecarstereo.Com - Wholesale Car Audio/Stereo Deals At Bargain Prices. It now looks like this: (Sorry about the glare on the screen). It's up to you whether you want a double din or not. I suspect most guys will want a 'finished' look and lean towards the double din. Only problem is that they are on the expensive side. In the pic directly below you can see a blue USB (2GB) stick that I have plugged in to the USB input of the HU with MP3's in various folders. The HU allows me to browse through various folders even while a song is playing! Which for me is f*&king sweeet! I do not own an Ipod - but this unit also has a dedicated connection for one. Not that I'm advertising for Kenwood, but the unit can be expanded to include an external CD changer, TV, Sat radio and Nav if you want to invest in those further on.
![Image]()
![Image]()
After removing the stock HU, and disconnecting the wires from the loom, the rear of it looks like this:
![Image]()
As you can see - there is no auxiliary input to hard wire anything into the HU. There is a receptacle at the bottom that was not connected to anything...and I have no clue what it is for. I figure if that was for possible expansion, the HU might have had some more knobs or options available on the front...?? It could be a programming input??
It appears that our only options for expanding for use with your Ipod (or any other mp3 device) is what has been discussed in other threads: FM transmitters / FM modulators / cassette adapters. It seems as though the inline modulator would be your best choice if you want to keep things original, and get the best quality? Tough luck if you want to play mp3 CD's or mp3's from a USB stick.
If after reading this far, and you are still interested in upgrading your stereo...read on....Note: this is pretty much the same thing for any Japanese car.
For safety - Please disconnect your -ve battery teminal before attempting this. I did not disconnect mine while swapping the HU's as I needed power to the wiring behind the deck to figure out what wires was for what. If you choose to do it like that...do it at your own risk.
This was available in another link, but here are a couple of pics showing how to remove the face to access the stereo...Pop the face off with a flat head screwdriver at various corners, and pull the face out. Be careful not to damage the upholstery or the face - as it could look unsightly after.
![Image]()
![Image]()
Please note that this was surprisingly very easy to do....and as such the word thieves come into mind... However, my stereo was screwed down with T20 tork screws (pic below - slightly out of focus - sorry)....which luckily I had a driver for. The common thieves would probably not have that with them - so that was a bit of relief for me. Incidentally, alot of other screws around the upholstery were tork screws (T20 or T15). I actually swapped my HU with the one in my bro's XTrail - as his CD section was not working, and his deck was screwed down with phillips screws.
![Image]()
Disconnect the harnesses for the 4WD, A/C and hazard lights. These may be a bit tough - and a narrow blade flat head may come in handy here to prize the clips off. You would now be able to see the screws that are holding the HU in place. Remove them. Pull the HU out - and disconnect the antenna and two harnesses at the back.
I don't know if there are adapters that you could use to plug right in to these original jacks, and go straight back to your new HU....But I didn't worry about that. I cut off both jacks from the wiring. Ensure you leave sufficient length of wiring on the jacks in case you want/need to re-connect the original HU. The use of a nippers allows you to cut them quite easily. Plug the jacks back into the HU and store your HU in a safe place.
Now the tricky part...figuring out the wiring....Note: this is similar for most Japanese cars I have come across (Nissan, Honda, Subaru, Mitsubishi, Toyota). Your colour coding on the wiring may be different from mine....but I think the wires should be the same. If you look at the pic above of the rear of the deck - you will see two wires taped together (not the plain green ones)...those are the +ve and accessory wires. Now (please don't kill me, but) I can't remember which was which. I want to say that the orange one is the acc input, and the yellow coloured one is the +ve wire. If you didn't disconnect your battery terminal as yet, a multimeter (or a spare 12V dc bulb) would be real handy right about now. Or you may want to reconnect your batt and check. Be sure no wires are in contact with each other, or any part of the vehicle!! In case you don't know how to check this with a multimeter....let me know. The single wire taped to the green wire is the ground (gnd / -ve). I did not use this to reconnect the new HU - instead I connected the new gnd to a screw that screws in to the body for a more direct ground. I don't know if it would make a difference...but you can try it.
You would also see a red wire pointing upwards....this is a 12V+ supply that comes out from the HU and powers the antenna. You would need to connect the 12V+ out (normally called P cont on aftermarket HU's) from your new HU to this. Many aftermarket units (probably if not all) also have an Ant Cont wire for motorized antennas....You can probably use this one too...I didn't - I used the P Cont wire. (I also used this supply for the turn-on for my amplifiers).
The wires that are twisted together are the speaker outputs. The ones on the connector with four wires are for the rear speakers. I can't recall which ones were right or left. If it matters to you (and you tend to play with your balance often - which I never do), you can test this with a AA 1.5V battery between the two wires, and see where the sound comes from..... I can't recall which ones were +ve and -ve either (sorry again :-( ). But if you are going to attempt this on your own, PM or email me - and I can check back my wiring behind the stereo to see which is which. Or I may find some time later on to check it, and edit this post. Insert the antenna plug into the HU.
Once you've made your necessary connections and all loose ends and joinings are secure....it's time to test. Reconnect your battery - and turn your ignition to ACC. Go ahead and test to make sure everything is sounding right before you button back up. Enjoy.
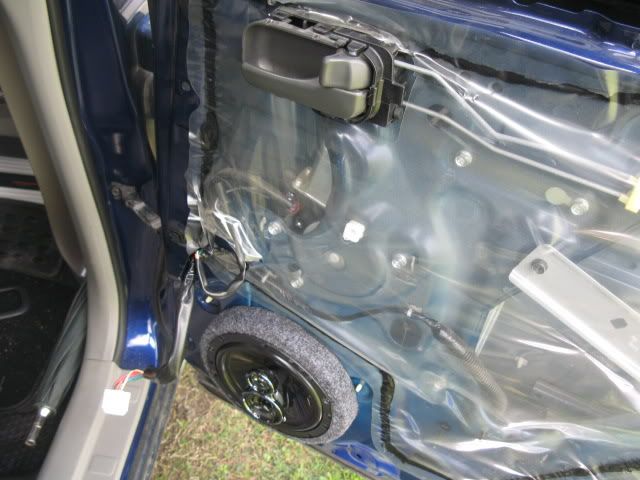
I expanded my system to include two amplifiers, changed out the door speakers, and threw a sub in the rear. I utilized the existing wiring behind the HU to feed the door speakers. I know this is less than ideal....but it makes for an easier, quicker install, and still sounds great. A couple points of note if you're messing with door speakers...I had to install 1 inch spacers between the new speakers and the door in order for the magnets to clear the window track. Also, before you remove the old speakers, mark the circle where they are located. Use this as your guide for the placement of the new ones, as improper placement would interfere with the cut out in the upholstery for the speaker. The amps are screwed down below the two front seats. I had to remove the seats and centre console to make access to do this.
My final install comprises:
Kenwood DDX 812 head unit (with 3 pairs of crossed over outputs)
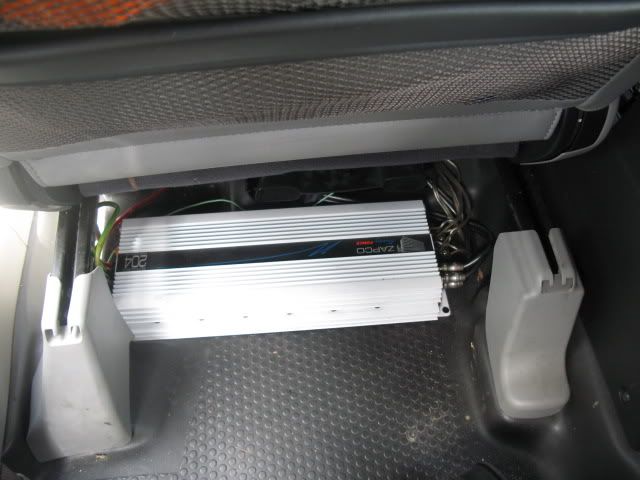
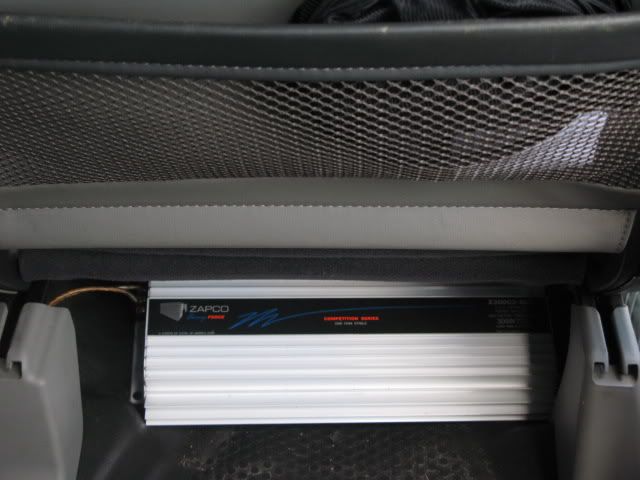
Zapco Studio 204 (50x4) for mid-upper range feeding
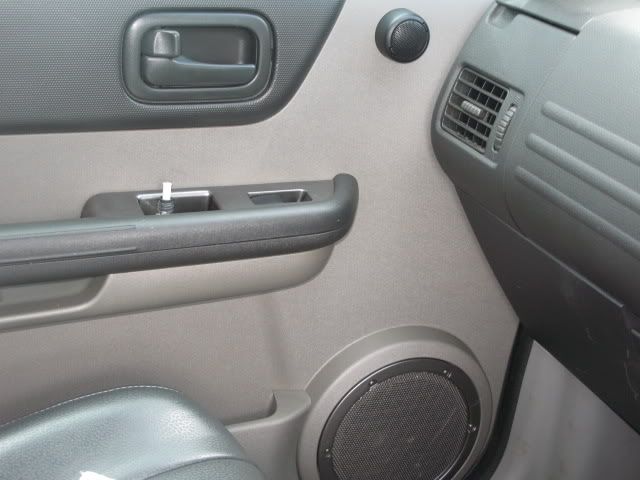
1 pair Boston Acoustics component set in front doors (tweeter pictured)
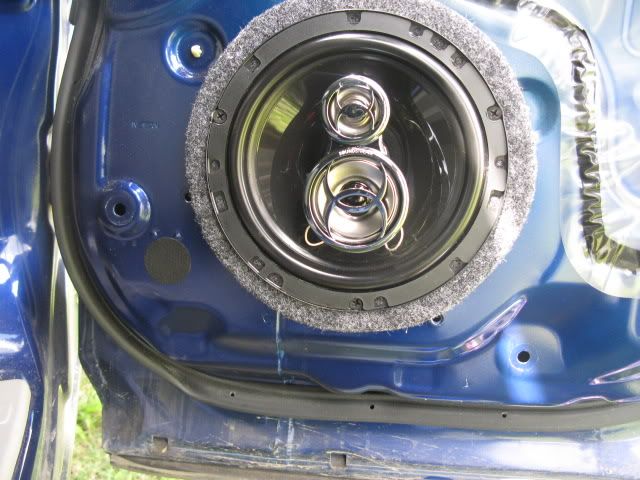
1 pair Soundstream Picasso 6" 3 way in rear doors (pictured)
Zapco Z300 (300x1 @ 1 ohm) sub amp feeding
1 JL Audio 12W3 (dual 2 ohm).
Studio 204 amp:
![Image]()
Doors:
![Image]()
![Image]()
![Image]()
Z300 Competition amp:
![Image]()
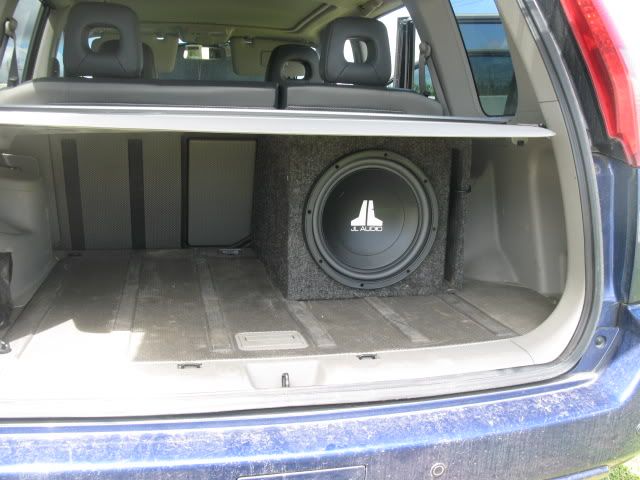
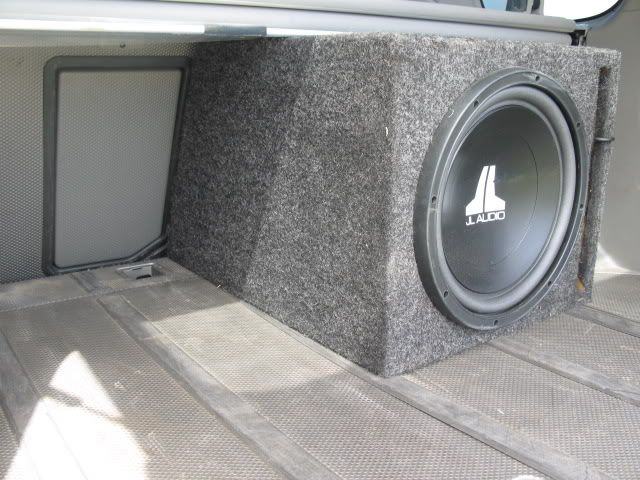
Sub:
![Image]()
![Image]()
Bonus pics:
![Image]()
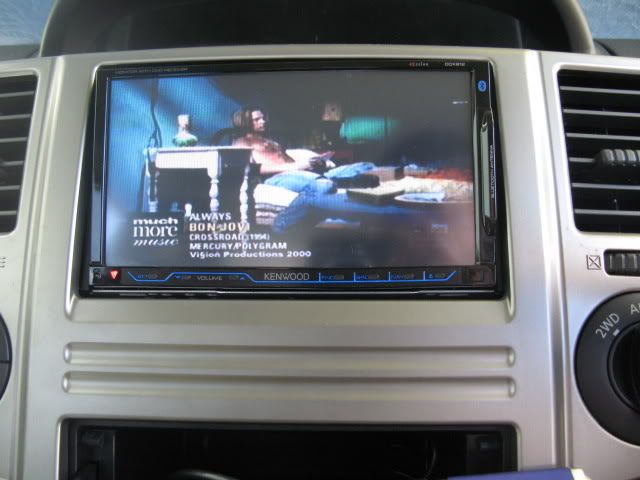
Stuck in a music video dvd to see the quality of the picture:
![Image]()
Well I hope the 2 hours I spent putting this together is helpful to some of you guys out there looking to upgrade, and answers some questions about expansion. Future plans may see a 10" flip down screen added to the roof of the cargo area for an upcoming island car show for Easter.
I replaced mine with a Kenwood double din HU (DDX 812). Cost me US$ 713 at Onlinecarstereo.Com - Wholesale Car Audio/Stereo Deals At Bargain Prices. It now looks like this: (Sorry about the glare on the screen). It's up to you whether you want a double din or not. I suspect most guys will want a 'finished' look and lean towards the double din. Only problem is that they are on the expensive side. In the pic directly below you can see a blue USB (2GB) stick that I have plugged in to the USB input of the HU with MP3's in various folders. The HU allows me to browse through various folders even while a song is playing! Which for me is f*&king sweeet! I do not own an Ipod - but this unit also has a dedicated connection for one. Not that I'm advertising for Kenwood, but the unit can be expanded to include an external CD changer, TV, Sat radio and Nav if you want to invest in those further on.

After removing the stock HU, and disconnecting the wires from the loom, the rear of it looks like this:
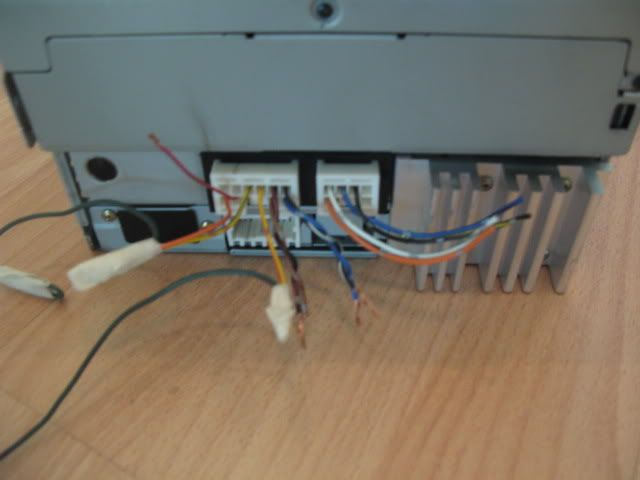
As you can see - there is no auxiliary input to hard wire anything into the HU. There is a receptacle at the bottom that was not connected to anything...and I have no clue what it is for. I figure if that was for possible expansion, the HU might have had some more knobs or options available on the front...?? It could be a programming input??
It appears that our only options for expanding for use with your Ipod (or any other mp3 device) is what has been discussed in other threads: FM transmitters / FM modulators / cassette adapters. It seems as though the inline modulator would be your best choice if you want to keep things original, and get the best quality? Tough luck if you want to play mp3 CD's or mp3's from a USB stick.
If after reading this far, and you are still interested in upgrading your stereo...read on....Note: this is pretty much the same thing for any Japanese car.
For safety - Please disconnect your -ve battery teminal before attempting this. I did not disconnect mine while swapping the HU's as I needed power to the wiring behind the deck to figure out what wires was for what. If you choose to do it like that...do it at your own risk.
This was available in another link, but here are a couple of pics showing how to remove the face to access the stereo...Pop the face off with a flat head screwdriver at various corners, and pull the face out. Be careful not to damage the upholstery or the face - as it could look unsightly after.
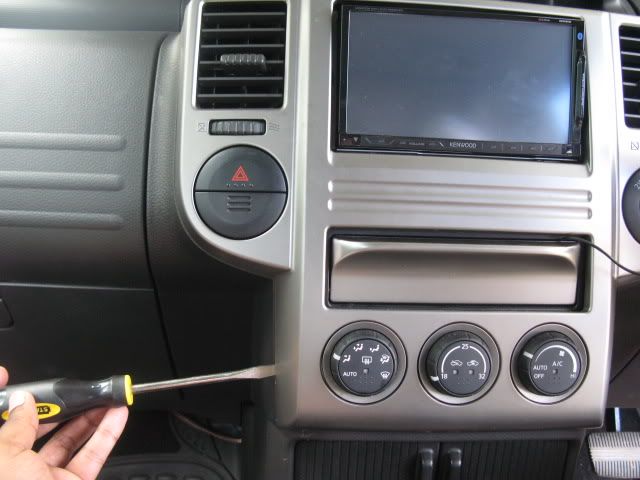
Please note that this was surprisingly very easy to do....and as such the word thieves come into mind...
However, my stereo was screwed down with T20 tork screws (pic below - slightly out of focus - sorry)....which luckily I had a driver for. The common thieves would probably not have that with them - so that was a bit of relief for me. Incidentally, alot of other screws around the upholstery were tork screws (T20 or T15). I actually swapped my HU with the one in my bro's XTrail - as his CD section was not working, and his deck was screwed down with phillips screws.
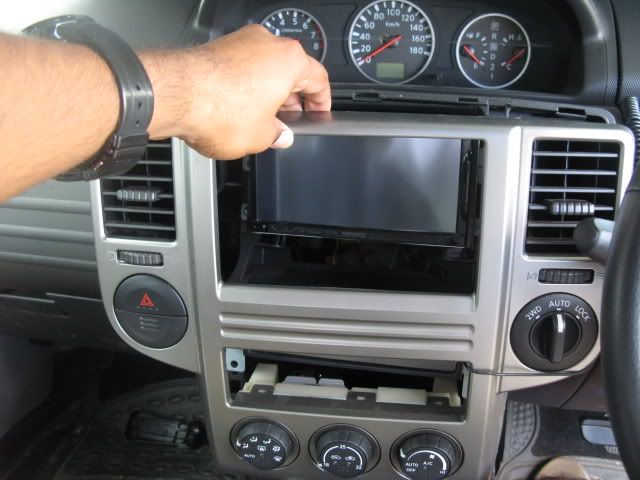
Disconnect the harnesses for the 4WD, A/C and hazard lights. These may be a bit tough - and a narrow blade flat head may come in handy here to prize the clips off. You would now be able to see the screws that are holding the HU in place. Remove them. Pull the HU out - and disconnect the antenna and two harnesses at the back.
I don't know if there are adapters that you could use to plug right in to these original jacks, and go straight back to your new HU....But I didn't worry about that. I cut off both jacks from the wiring. Ensure you leave sufficient length of wiring on the jacks in case you want/need to re-connect the original HU. The use of a nippers allows you to cut them quite easily. Plug the jacks back into the HU and store your HU in a safe place.
Now the tricky part...figuring out the wiring....Note: this is similar for most Japanese cars I have come across (Nissan, Honda, Subaru, Mitsubishi, Toyota). Your colour coding on the wiring may be different from mine....but I think the wires should be the same. If you look at the pic above of the rear of the deck - you will see two wires taped together (not the plain green ones)...those are the +ve and accessory wires. Now (please don't kill me, but) I can't remember which was which. I want to say that the orange one is the acc input, and the yellow coloured one is the +ve wire. If you didn't disconnect your battery terminal as yet, a multimeter (or a spare 12V dc bulb) would be real handy right about now. Or you may want to reconnect your batt and check. Be sure no wires are in contact with each other, or any part of the vehicle!! In case you don't know how to check this with a multimeter....let me know. The single wire taped to the green wire is the ground (gnd / -ve). I did not use this to reconnect the new HU - instead I connected the new gnd to a screw that screws in to the body for a more direct ground. I don't know if it would make a difference...but you can try it.
You would also see a red wire pointing upwards....this is a 12V+ supply that comes out from the HU and powers the antenna. You would need to connect the 12V+ out (normally called P cont on aftermarket HU's) from your new HU to this. Many aftermarket units (probably if not all) also have an Ant Cont wire for motorized antennas....You can probably use this one too...I didn't - I used the P Cont wire. (I also used this supply for the turn-on for my amplifiers).
The wires that are twisted together are the speaker outputs. The ones on the connector with four wires are for the rear speakers. I can't recall which ones were right or left. If it matters to you (and you tend to play with your balance often - which I never do), you can test this with a AA 1.5V battery between the two wires, and see where the sound comes from..... I can't recall which ones were +ve and -ve either (sorry again :-( ). But if you are going to attempt this on your own, PM or email me - and I can check back my wiring behind the stereo to see which is which. Or I may find some time later on to check it, and edit this post. Insert the antenna plug into the HU.
Once you've made your necessary connections and all loose ends and joinings are secure....it's time to test. Reconnect your battery - and turn your ignition to ACC. Go ahead and test to make sure everything is sounding right before you button back up. Enjoy.
I expanded my system to include two amplifiers, changed out the door speakers, and threw a sub in the rear. I utilized the existing wiring behind the HU to feed the door speakers. I know this is less than ideal....but it makes for an easier, quicker install, and still sounds great. A couple points of note if you're messing with door speakers...I had to install 1 inch spacers between the new speakers and the door in order for the magnets to clear the window track. Also, before you remove the old speakers, mark the circle where they are located. Use this as your guide for the placement of the new ones, as improper placement would interfere with the cut out in the upholstery for the speaker. The amps are screwed down below the two front seats. I had to remove the seats and centre console to make access to do this.
My final install comprises:
Kenwood DDX 812 head unit (with 3 pairs of crossed over outputs)
Zapco Studio 204 (50x4) for mid-upper range feeding
1 pair Boston Acoustics component set in front doors (tweeter pictured)
1 pair Soundstream Picasso 6" 3 way in rear doors (pictured)
Zapco Z300 (300x1 @ 1 ohm) sub amp feeding
1 JL Audio 12W3 (dual 2 ohm).
Studio 204 amp:
Doors:
Z300 Competition amp:
Sub:
Bonus pics:
Stuck in a music video dvd to see the quality of the picture:
Well I hope the 2 hours I spent putting this together is helpful to some of you guys out there looking to upgrade, and answers some questions about expansion. Future plans may see a 10" flip down screen added to the roof of the cargo area for an upcoming island car show for Easter.